Run a task
This topic provides detailed steps from creating a task to running a task online.
Before you start
- Log in to Mini Program Platform.
- Create an audience.
- Create a campaign.
- Apply for message templates.
Procedures
To run a task online, there are four steps you can expect:
Step 1: Create a task
- First, create a campaign, then navigate to Task and click Create Task.
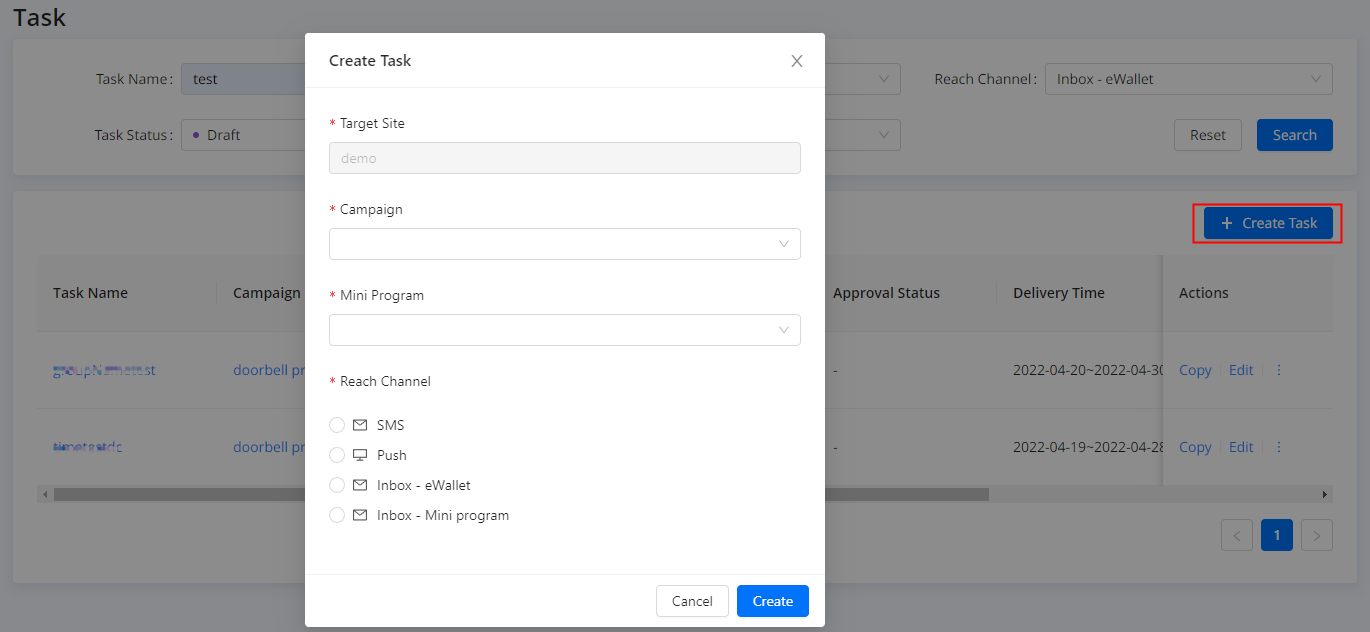 2. Specify the following information for your task and click Create:
- Target Site: The target site where you want to execute marketing campaigns and tasks.
- Campaign: Select a campaign from the campaigns you created.
- Mini Program: Select a mini program under the target site where you want to execute marketing campaigns and tasks.
- Reach Channel: Decide which channel you use to reach target audiences.
- Push: Push notifications pop up in the notification tray or the notification inbox on a user's mobile device.
- SMS: SMS (Short Message Service) notifications are brief text messages sent to your users, such as sending one-time passwords or promotion texts with links.
- Inbox-eWallet: The Inbox-eWallet channel allows you to display an inbox message within the super app.
- Inbox-Mini Program: The Inbox-Mini Program channel allows you to display an inbox message within a mini program.
Step 2: Configure a task
To configure a task, there are three steps involved:

2.1 Set basic information
- On the Basic Info page, specify the basic information and click Next:
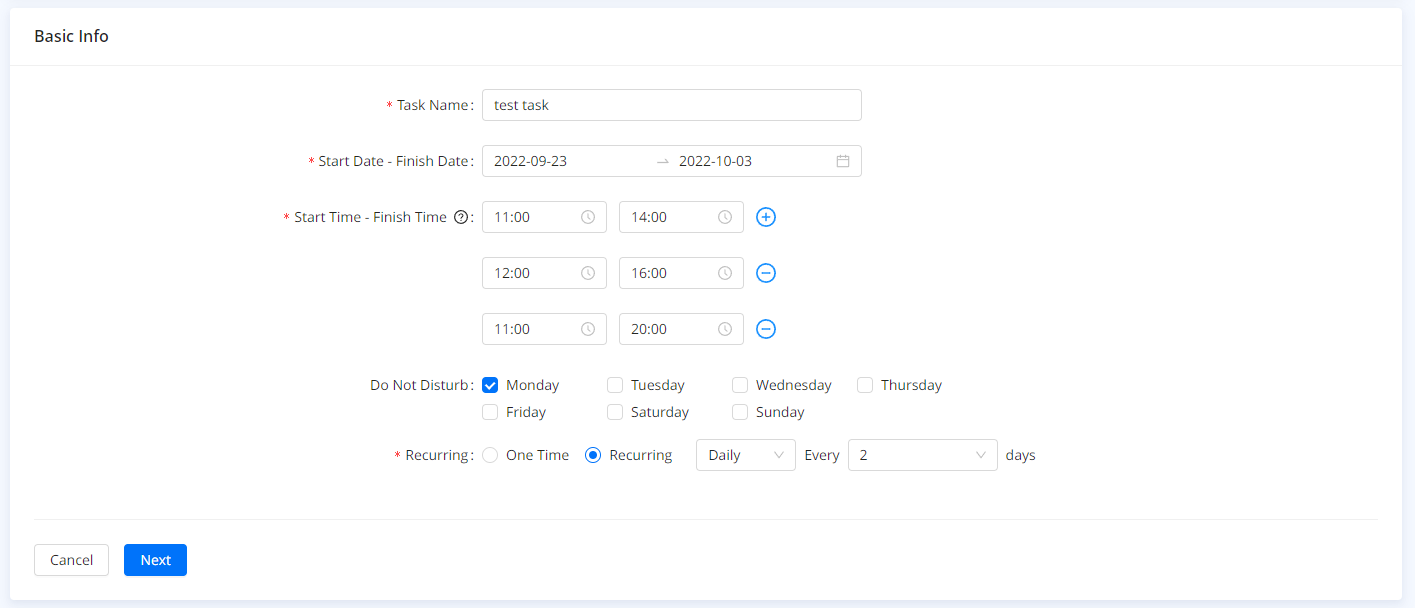
The basic information includes:
- Task Name: Enter a name for the task, within 64 characters.
- Start Date - Finish Date: Specify a date range to deliver notifications to users.
- Start Time - Finish Time: Specify one or multiple time ranges to deliver notifications to users. Note: The next start time should be later than the previous finish time. The time range between start time and end time must exceed 2 hours.
- (Optional) Do Not Disturb: Specify when not to deliver notifications to users. For example, you choose Monday, which means the notifications will be delivered to users on every day of the week except Monday.
- Recurring: The frequency of the notification delivery task:
- One-Time: Deliver notifications to users once within a specified time period.
- Recurring: Deliver notifications to users multiple times within a specified time period.

- Daily: Deliver notifications to users on a daily basis within a specified time period. For example, Every 2 days means sending notifications every 2 days within the time range.

- Weekly: Deliver notifications to users on a weekly basis within a specified time period. For example, Weekly On Tuesday means sending notifications every Tuesday within the time range.

- Monthly: Deliver notifications to users on a monthly basis. For example, Monthly On day 18 means sending notifications on the 18th day of every month within the time range.

2.2 Set target audiences
- To set target audiences, make sure you have created an audience before. If not, Click Create Audience to create a new audience. Note: You will be directed to the Create Target Audience page and the basic information you set will be lost.
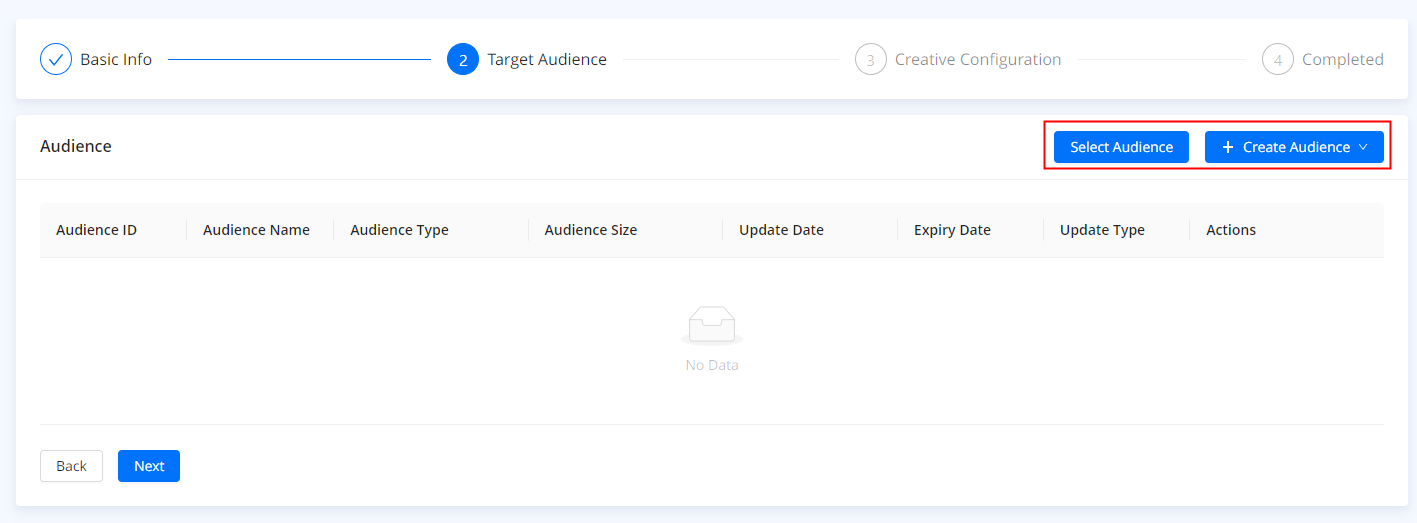
- Navigate to the Target Audience page and click Select Audience. On the Select Audience window, you can find all the audiences you created. Find the target audience and Click Select.

- Click Next.

2.3 Set creative configurations
Set creative configurations to organize the content structure of your notifications.
- On the Creative Configuration page, click Add Creative.
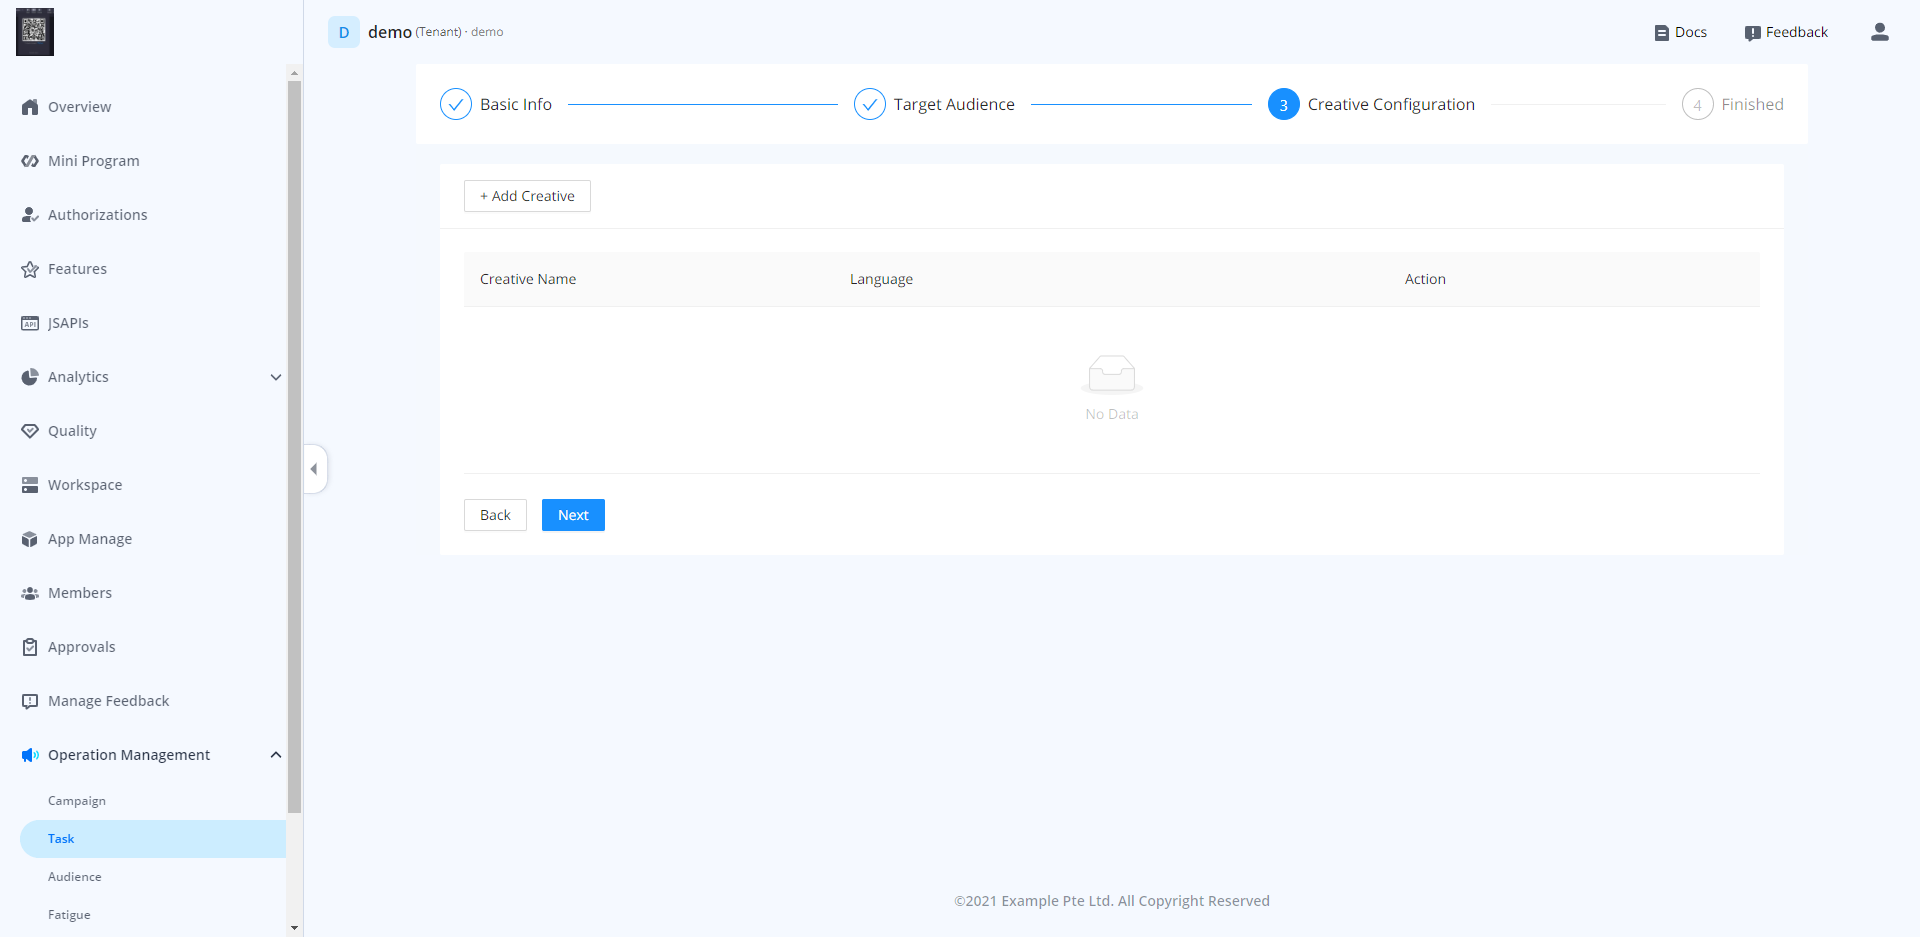
- On the Create a New Creative window, specify the following information for the creative and click Save:
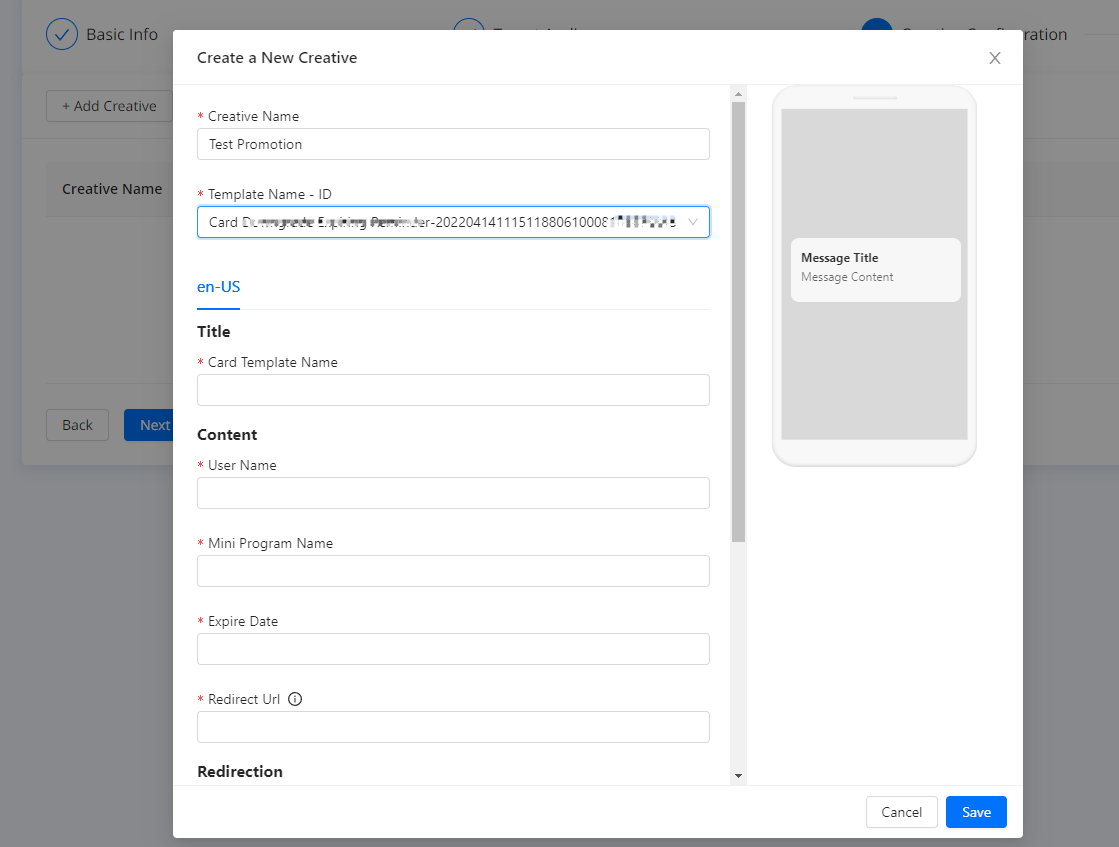
- Creative Name: Enter a name for the creative, within 100 characters.
- Template Name - ID: Select a notification template.
- Title: Enter a title for the notification to highlight what the notification is meant for.
- Content: Specify the content to determine what users will see.
- Redirection: Specify the redirection URLs to determine where users will be redirected.
Note: The information to specify differs based on different templates.
- Then, click Next > OK to complete the task configuration. You can also click Edit to modify the configuration or click Remove to delete the creative.

- The task is created and configured successfully.

Step 3: Test a task
- Navigate to the task management page and you'll find your task here, which is in the Draft status.

- To test the task, click the "⋮" icon under the Actions tab and then click Test.

- On the Pilot Testing window, add one or more testers and click Test to send a testing notification to the testers.
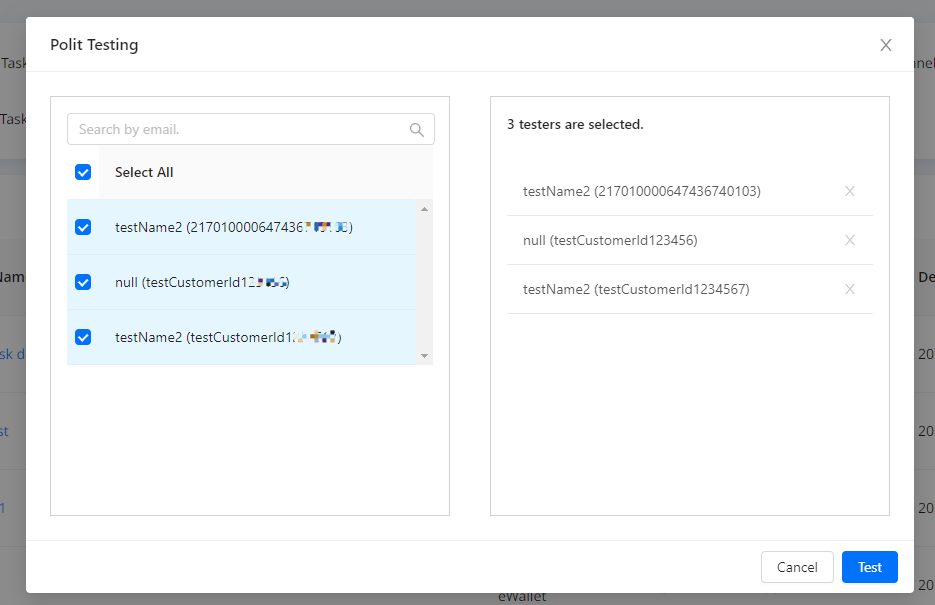
- Then the task is changed from Draft to Testing.

Step 4: Run a task
- Once the testing is passed, click Start to send a request for admin or reviewer's approval to run the task.
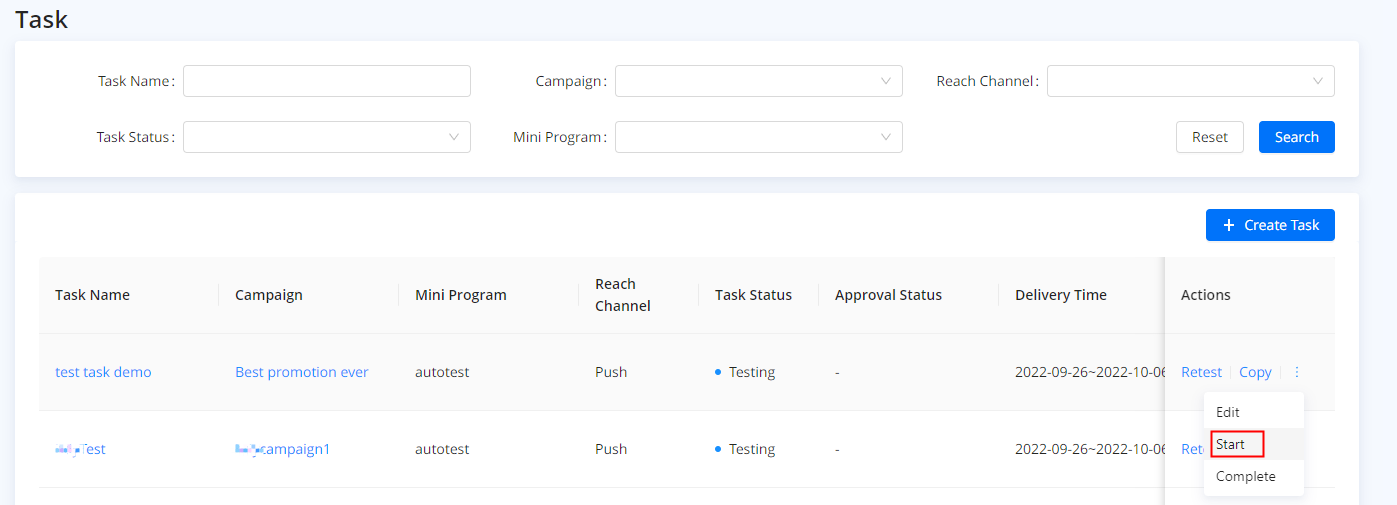
- On the Task Running Request window, enter reasons to run the task and click Submit.

- Once approved, the task runs online immediately.